
Fixing WinSXS manually, when DISM resigns
WinSXS corruption (the component store is repairable) is often a tedious task to repair, especially when working on Windows Server 2016 where builtin commands might not be able to fix this out of the box. This guide shows a way that worked in most circumstances to get WinSXS consistent again.
We are regularly checking running operating systems for integrity. One important component on Windows is the side-by-side store (mostly known as WinSXS). Having quite some Windows Server 2016 Servers running, we saw an increasing number of systems with WinSXS corruption with the result component store can be repaired when running dism /online /cleanup-image /scanhealth
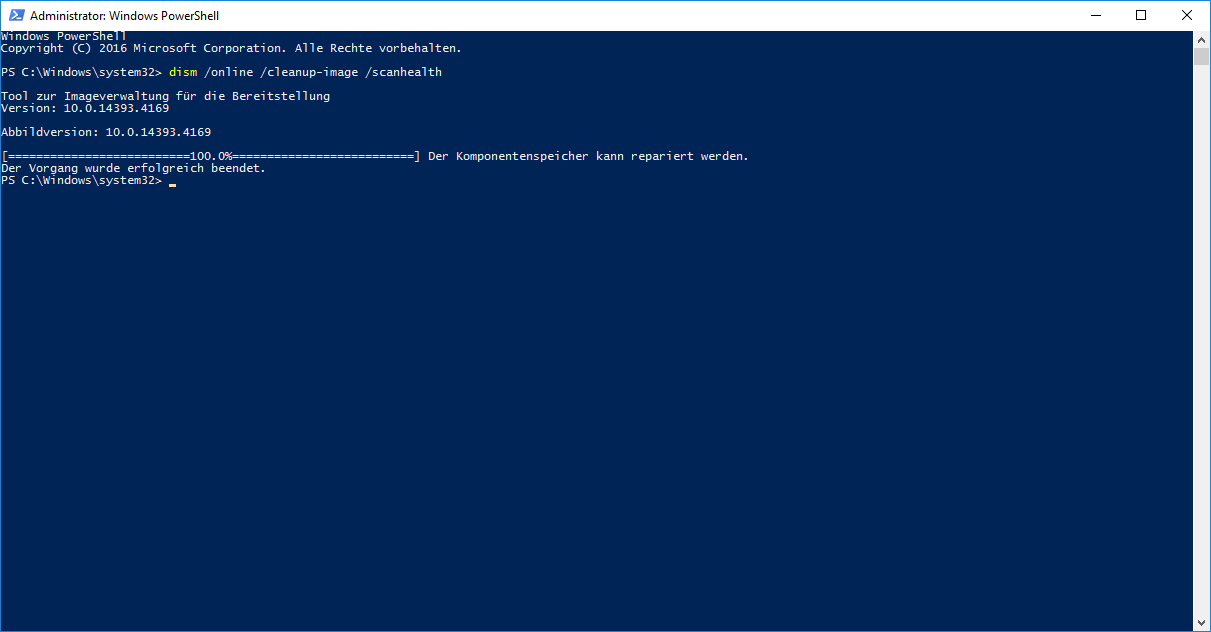
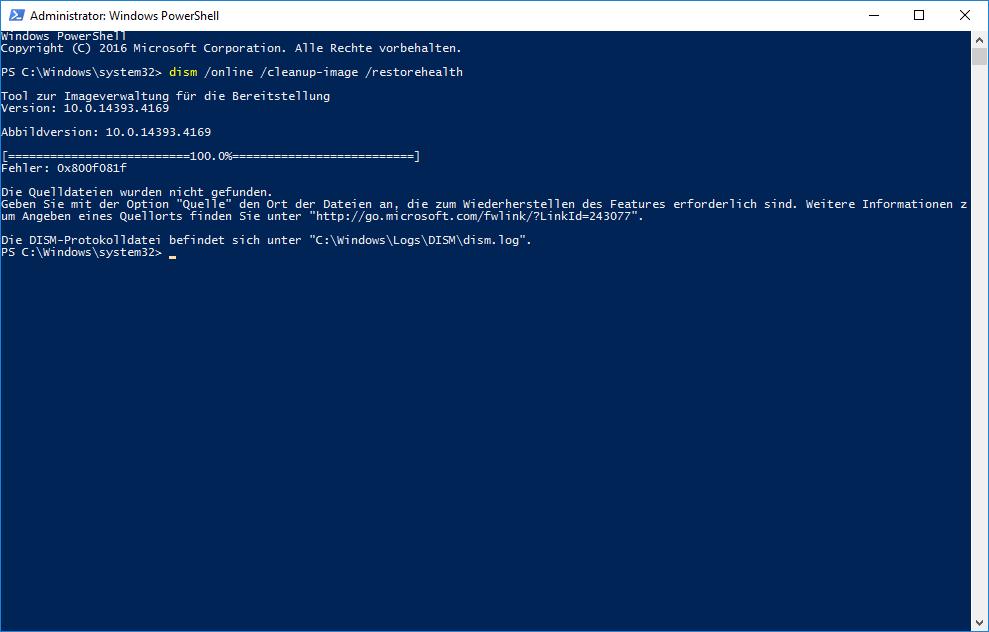
When receiving this error (The component store is repairable / Der Komponentenspeicher kann repariert werden), you might be able to repair the side-by-side store directly using dism (dism /online /cleanup-image /restorehealth), even if you're trying to query Windows Update servers. Yet chances are high that it will fail and one of the following errors might be shown:
- 0x800f081f
The source files could not be found.
Die Quelldateien wurden nicht gefunden. - 0x800706c6
The array bounds are invalid.
Die Datenfeldgrenzen sind unzulässig.
In both cases (and there are probably many more), you might try to do two things:
- Point to another, similar installation to use as source files
- Mount installation media and try to use it as source files
If both options don't work, you can try the following, more manual approach.
Check out the CBS.log to find missing packages
Regarding the type of error, we skip the DISM.log and open directly CBS.log to search (from bottom up) for either error messages or a summary information.
An error message corresponding to the DISM output might look like on of those two examples:
2022-06-26 16:25:18, Info                  CBS    Exec: Processing complete, session(Corruption Repairing): 30968166_361935165 [HRESULT = 0x800f081f - CBS_E_SOURCE_MISSING]
2022-06-26 16:25:18, Error                 CBS    Session: 30968166_361935165 failed to perform store corruption detect and repair operation. [HRESULT = 0x800f081f - CBS_E_SOURCE_MISSING]
2022-06-26 16:25:18, Info                  CBS    Session: 30968166_361935165 finalized. Download error: 0x800f094a [CBS_E_SOURCE_MISSING_FROM_WUSUS_BYPASS_CAB], Reboot required: no [HRESULT = 0x800f081f - CBS_E_SOURCE_MISSING]
2022-06-26 16:25:18, Info                  CBS    Failed to FinalizeEx using worker session [HRESULT = 0x800f081f]
2022-06-26 16:27:19, Info CBS Trusted Installer is shutting down because: SHUTDOWN_REASON_AUTOSTOP2022-06-25 16:36:51, Info CBS Exec: Processing complete, session(Corruption Repairing): 30967965_3451135828 [HRESULT = 0x800706c6 - RPC_S_INVALID_BOUND]
2022-06-25 16:36:51, Error CBS Session: 30967965_3451135828 failed to perform store corruption detect and repair operation. [HRESULT = 0x800706c6 - RPC_S_INVALID_BOUND]
2022-06-25 16:36:51, Info CBS Session: 30967965_3451135828 finalized. Download error: 0x800706c6 [RPC_S_INVALID_BOUND], Reboot required: no [HRESULT = 0x800706c6 - RPC_S_INVALID_BOUND]
More important, the Detect and Repair summary looks like this:
Summary:
Operation: Detect and Repair
Operation result: 0x800706c6
Last Successful Step: Entire operation completes.
Total Detected Corruption:	83
	CBS Manifest Corruption:	83
	CBS Metadata Corruption:	0
	CSI Manifest Corruption:	0
	CSI Metadata Corruption:	0
	CSI Payload Corruption:	0
Total Repaired Corruption:	0
	CBS Manifest Repaired:	0
	CSI Manifest Repaired:	0
	CSI Payload Repaired:	0
CSI Store Metadata refreshed: TrueThe summary tells us, that in the CBS store, quite some manifests are corrupt. Manifests are mostly metadata files (like XML) that describe packages etc.
To find out what packages are affected, just scroll up a little bit and you'll see the detailed list of affected packages:
(p)	CBS Catalog Missing			Package_2882_for_KB4489889~31bf3856ad364e35~amd64~~10.0.1.6
(p)	CBS Catalog Missing			Package_2883_for_KB4489889~31bf3856ad364e35~amd64~~10.0.1.6
(p)	CBS Catalog Missing			Package_2884_for_KB4489889~31bf3856ad364e35~amd64~~10.0.1.6
And this is the point where we'll be starting with our manual approach.
Restore missing packages from windows update
As windows itself is not able to find the source files for these packages, we're going to help a little bit.
In the message you can determine the affected update: Package_2884_for_KB4489889~31bf3856ad364e35~amd64~~10.0.1.6 is contained in update KB4489889.
Download the update package
In order to download the update package manually, we will go to Windows Update Catalog and search for the name of the update (in this case KB4489889).
From the results, select the version that matches your operating system version and edition and click the download button to download the file.
Unpack the package (twice)
Having downloaded the update, you need to unpack it twice:
- First, unpack the MSU
- Second, unpack CABs within the MSU
To extract the MSU file, we use the builtin expand command:
# extract MSU
mkdir C:\temp\kb4485447_msu
expand -F:* "C:\temp\windows10.0-kb4485447-x64_e9334a6f18fa0b63c95cd62930a058a51bba9a14.msu" C:\temp\kb4485447_msuThe extracted files will mostly be cab archives.

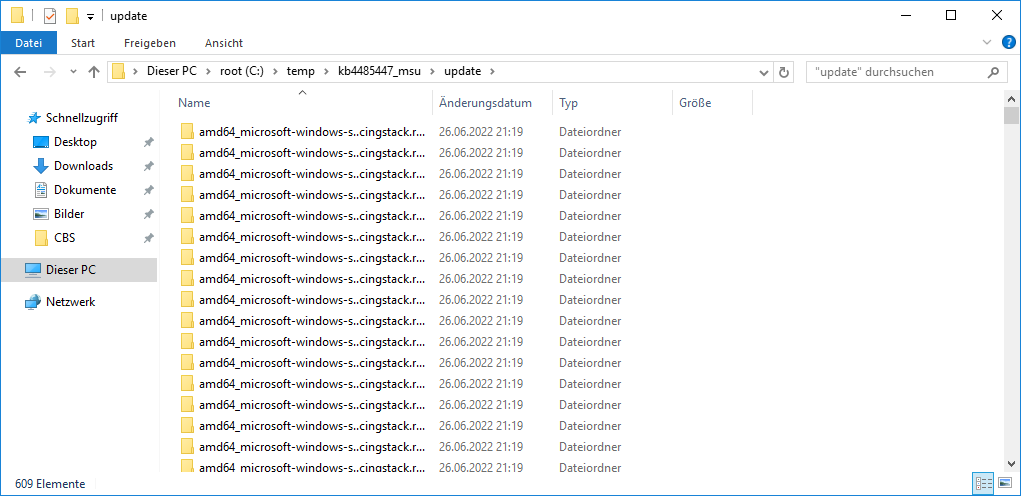
So, now we've extracted the MSU archive but not yet our manifests we need. To get these, we need to extract the actual update package (the selected CAB archive in the screenshot above) within our already extract files.
mkdir C:\temp\kb4485447_msu\update
expand -F:* "C:\temp\kb4485447_msu\Windows10.0-KB4485447-x64.cab" C:\temp\kb4485447_msu\update
CAB files containe a whole bunch of nested files and directories - so don't worry if this takes a moment, even if the file is rather small.
So, we've extracted our package and are now ready to run DISM again to fix the SXS store.
Run DISM with Source flag
Having our package files in place, we will now run DISM with an explicit location for the source files:
dism /online /cleanup-image /restorehealth /LimitAccess /Source:C:\temp\kb4485447_msu\updateThis will take a while but have a quite high chance to fix our issue.
After the repair has completed successfully, remove the downloaded update package and the extracted items and enjoy that you've fixed the SXS store :-)